Gmail Setup: Difference between revisions
No edit summary |
No edit summary |
||
| Line 25: | Line 25: | ||
*** '''Toronto Office:''' <code>tol.firstname.lastname</code> (e.g., tol.john.smith) | *** '''Toronto Office:''' <code>tol.firstname.lastname</code> (e.g., tol.john.smith) | ||
*** '''Vancouver Office:''' <code>van.firstname.lastname</code> (e.g., van.john.smith) | *** '''Vancouver Office:''' <code>van.firstname.lastname</code> (e.g., van.john.smith) | ||
*** '''Winnipeg Office:''' <code>win.firstname.lastname</code> (e.g., win.john.smith) [[File:Gmail address.png]] | *** '''Winnipeg Office:''' <code>win.firstname.lastname</code> (e.g., win.john.smith) <br> <br>[[File:Gmail address.png]]<br> | ||
** Ensure you write down the password you create for future reference.<br> | ** Ensure you write down the password you create for future reference.<br> | ||
'''Step 4: Fill in Your Details''' | '''Step 4: Fill in Your Details''' | ||
Revision as of 19:53, 30 May 2024
PLEASE READ ALL INSTRUCTIONS BEFORE CREATING YOUR EMAIL!
Creating a Gmail address is a straightforward process, but it needs to be formatted a specific way depending on the office you will work for. Follow these detailed steps to ensure your new email address is set up correctly.
Steps to Create a New Gmail Address
Step 1: Navigate to Gmail
- Go to the Gmail website.
- Open your web browser and enter www.gmail.com in the address bar. Press ‘Enter’ to navigate to the site.
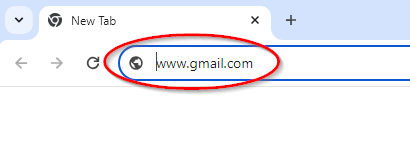
- Open your web browser and enter www.gmail.com in the address bar. Press ‘Enter’ to navigate to the site.

Step 2: Start the Account Creation
- Initiate a new account setup.
- Click on “Create Account” then select “For my personal use” from the small window that appears.
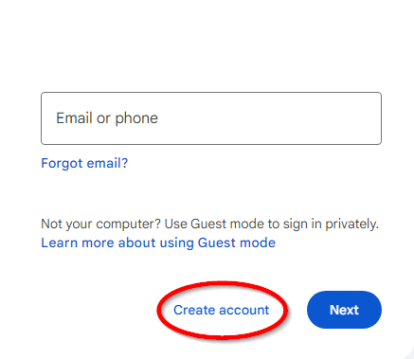
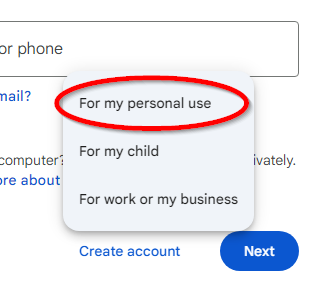
- Click on “Create Account” then select “For my personal use” from the small window that appears.


Step 3: Fill in Your Details
- Enter first and last name.
- Enter your first name in the top box, and your last name in the bottom box. Click Next after the information is filled in.
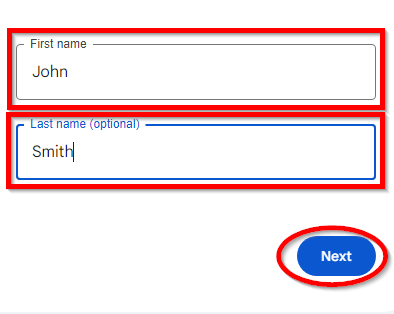
- Enter your first name in the top box, and your last name in the bottom box. Click Next after the information is filled in.

Step 4: Fill in Your Details
- Enter birthdate and gender.
- This isn't really required for only the Gmail and Drive services. Fill in anything you'd like. Click Next after the information is filled in.
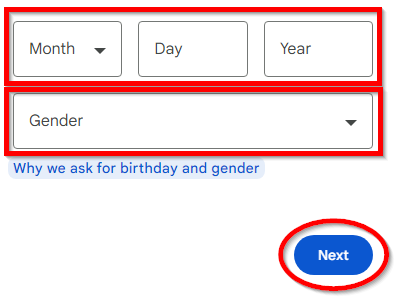
- This isn't really required for only the Gmail and Drive services. Fill in anything you'd like. Click Next after the information is filled in.

Step 5: Fill in Your Details
- Enter your personal information and desired email format.
- Fill in all required fields. Use the following format for your username, depending on which office you are affiliated with:
- Toronto Office:
tol.firstname.lastname(e.g., tol.john.smith) - Vancouver Office:
van.firstname.lastname(e.g., van.john.smith) - Winnipeg Office:
win.firstname.lastname(e.g., win.john.smith)
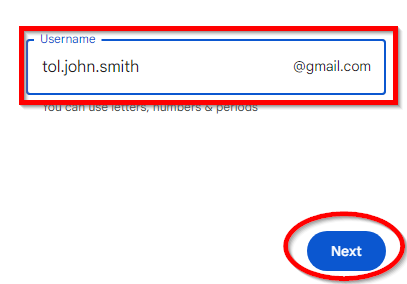
- Toronto Office:
- Ensure you write down the password you create for future reference.
- Fill in all required fields. Use the following format for your username, depending on which office you are affiliated with:

Step 4: Fill in Your Details
- Enter a password
- Enter the password you would like to use. Enter the same password again in the Confirm box. Click Next after the information is filled in.
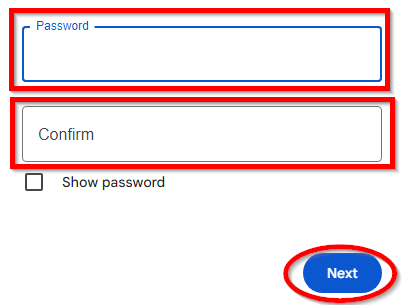
- Enter the password you would like to use. Enter the same password again in the Confirm box. Click Next after the information is filled in.

Step 6: Verification
- Provide contact details for verification.
- Enter a phone number for Google to send a verification code. Click Next after the information is filled in.
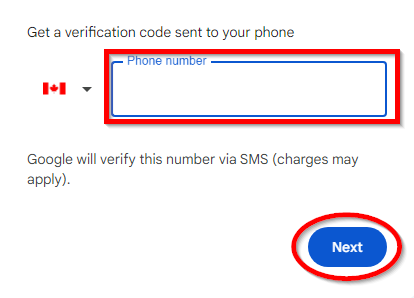
- Enter a phone number for Google to send a verification code. Click Next after the information is filled in.

Step 7: Enter Verification Code
- Complete the verification process.
- Google will send a text message with a code to the phone number provided. Enter this code into the box that says “Enter code”. Click Next after the information is filled in.
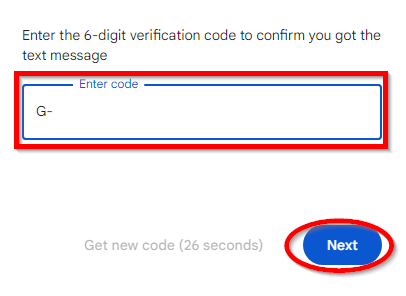
- Google will send a text message with a code to the phone number provided. Enter this code into the box that says “Enter code”. Click Next after the information is filled in.

Step 8: Avoid Linking to Personal Google Accounts
- Keep your work account separate.
- On the subsequent screen that asks about linking to your personal Google account, simply click “Skip” to keep this account strictly for work purposes.
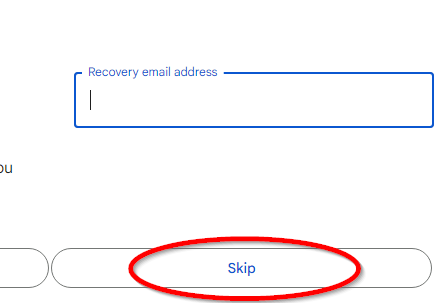
- On the subsequent screen that asks about linking to your personal Google account, simply click “Skip” to keep this account strictly for work purposes.

Step 9: Verify Details
- Make sure everything is correct
- Verify that the name, email address and recovery phone number are all correct. If they are, click Next.
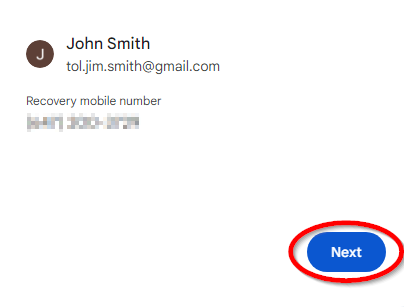
- Verify that the name, email address and recovery phone number are all correct. If they are, click Next.

Step 10: Accept Terms and Services
- Agree to Google’s terms to finalize account creation.
- Read Google’s Terms and Services. Once complete, scroll to the bottom and click on “I Agree”.
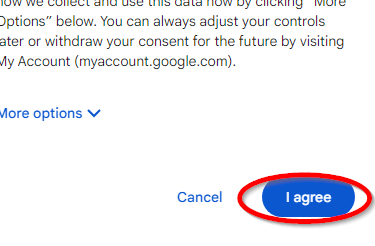
- Read Google’s Terms and Services. Once complete, scroll to the bottom and click on “I Agree”.

Completion
- Your Gmail account is now ready to use.
- Be sure to record your new email address and the password you've set for future access.
- Be sure to record your new email address and the password you've set for future access.
Note: If any information in this document is out-of-date or incorrect, please send an email to workfromhome@imkgp.com for assistance.