Send Snips and Screenshots: Difference between revisions
No edit summary |
No edit summary |
||
| Line 7: | Line 7: | ||
<span style="color: rgb(224, 62, 45); --darkreader-inline-color: #e34f40;" data-darkreader-inline-color="">'' ''</span> | <span style="color: rgb(224, 62, 45); --darkreader-inline-color: #e34f40;" data-darkreader-inline-color="">'' ''</span> | ||
'''Click here for instructions on how to Copy and Paste text.''' | '''[[Copy and Paste|Click here for instructions on how to Copy and Paste text.]]''' | ||
<span style="color: rgb(224, 62, 45); --darkreader-inline-color: #e34f40;" data-darkreader-inline-color="">'' ''</span> | <span style="color: rgb(224, 62, 45); --darkreader-inline-color: #e34f40;" data-darkreader-inline-color="">'' ''</span> | ||
Revision as of 16:32, 1 May 2024
Important Note:
Please use Snip & Sketch only for capturing information that cannot be easily copied and pasted, such as images or complex layouts. Avoid taking screenshots of text that can be copied and pasted directly, as this requires others to retype the information, which is inefficient and potentially error-prone.
Click here for instructions on how to Copy and Paste text.
What is a Screenshot or Snippet?A screenshot captures the entire visible screen, while a snippet allows you to select a specific area of your screen to capture. This is useful for documenting and sharing visual information quickly.
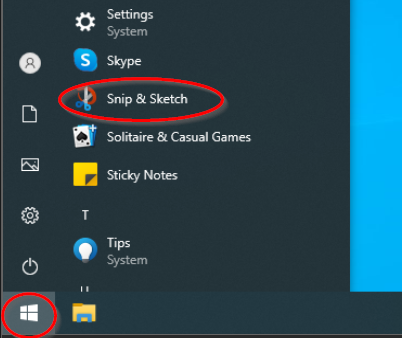
Step 1: Open Snip & Sketch
- Find the application in the Start Menu.
- Click on the Start menu icon at the bottom left of your screen. Scroll through the alphabetical list of apps to find "Snip & Sketch". If you see it, click on it to open.
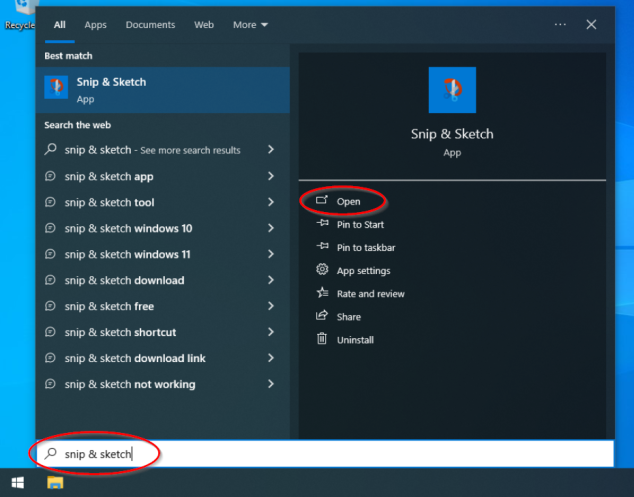
- If the application is not visible in the list, search for it:
- Click on the Start menu icon again and type "Snip & Sketch." The start menu will automatically change into a search box. Click on the application when it appears in the search results, then click on "Open" when the application properties show.
- Click on the Start menu icon again and type "Snip & Sketch." The start menu will automatically change into a search box. Click on the application when it appears in the search results, then click on "Open" when the application properties show.
- Click on the Start menu icon at the bottom left of your screen. Scroll through the alphabetical list of apps to find "Snip & Sketch". If you see it, click on it to open.


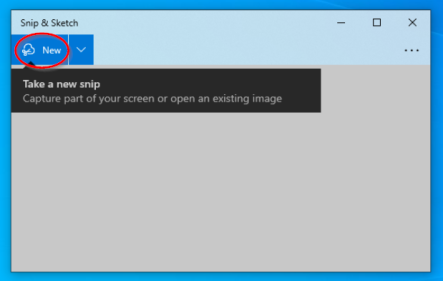
Step 2: Choose the Type of Snip
- Select the type of snip you need.
- Click 'New' in the application.
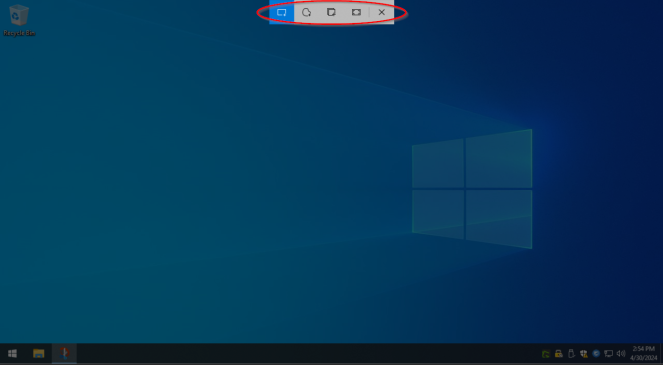
Choose from the following types of snips:- Free-form Snip: Draw an irregular shape around an area to capture.
- Rectangular Snip: Draw a rectangle with your cursor to capture a specific area.
- Window Snip: Select a specific window to capture only that window.
- Full-screen Snip: Capture the entire screen.
- Click 'New' in the application.


Step 3: Capture the Screenshot or Snippet
- Take the snip.
- For a free-form or rectangular snip, click and hold the left mouse button, then draw around the area you want to capture. Release the mouse button to capture the selected area.
- For a window snip, click the window you want to capture.
- For a full-screen snip, the screen will be captured automatically when you click 'New'.

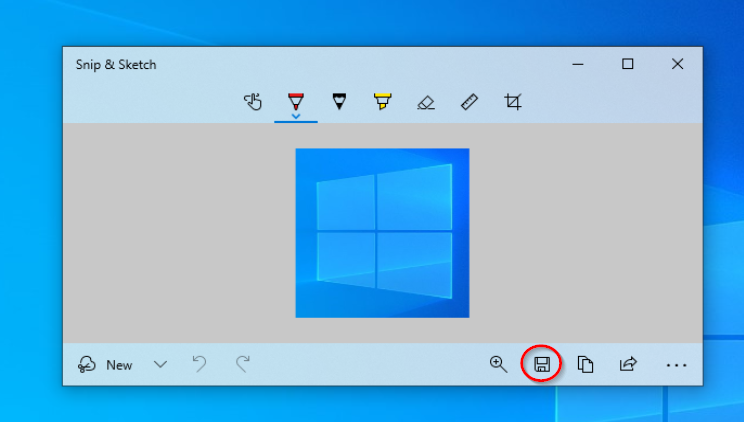
Step 4: Save the Screenshot or Snippet
- Save the file to the Documents folder.
- Click the Save icon in the Snipping Tool or Snip & Sketch window.
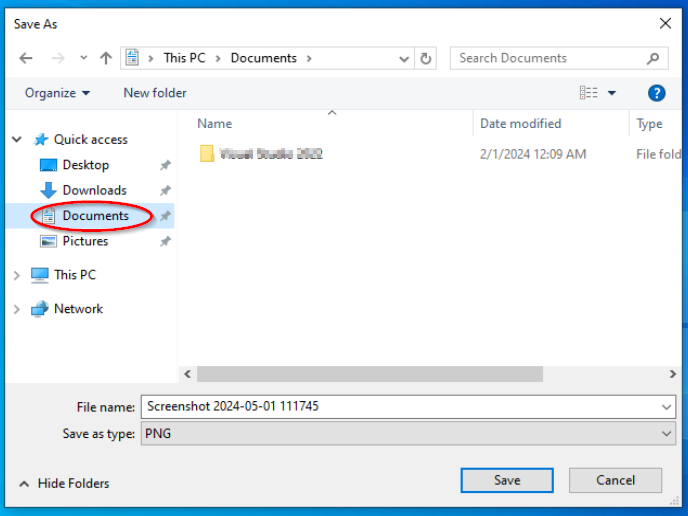
- In the save dialog box that appears, navigate to the Documents folder:
- On the left side of the save dialog box, click 'Documents'.
- On the left side of the save dialog box, click 'Documents'.
- Type a name for your file in the 'File name' field.
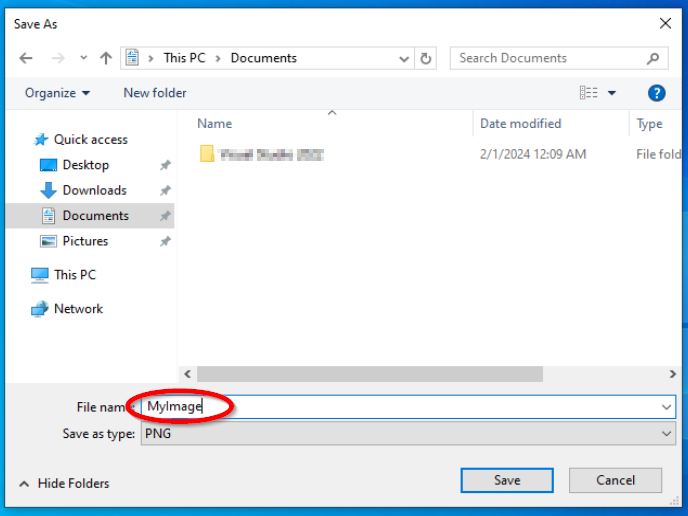
- Choose a file format, like JPEG or PNG, from the 'Save as type' dropdown menu.

- Click 'Save' to save your screenshot or snippet to the Documents folder.
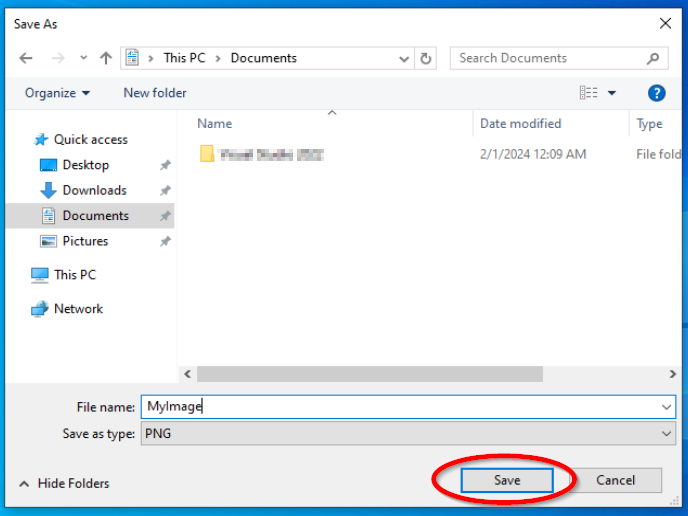
- You can now send this image via Gmail, or send this image via Slack.
- Click the Save icon in the Snipping Tool or Snip & Sketch window.


