Help Desk 2FA Setup: Difference between revisions
Jump to navigation
Jump to search
No edit summary |
No edit summary |
||
| Line 6: | Line 6: | ||
## If you have an Android phone, click the green ''Install'' button and wait for the app to install. <br> <br>[[File:Help desk 2fa setup app store.png|566x566px]]<br> | ## If you have an Android phone, click the green ''Install'' button and wait for the app to install. <br> <br>[[File:Help desk 2fa setup app store.png|566x566px]]<br> | ||
# Find the email from '''WatchGuard''', open it and click on the '''Start Activation''' button.<br> <br>[[File:Help desk 2fa setup watchguard email.png|453x453px]]<br> | # Find the email from '''WatchGuard''', open it and click on the '''Start Activation''' button.<br> <br>[[File:Help desk 2fa setup watchguard email.png|453x453px]]<br> | ||
# After the next page opens, click the '''Activate''' button. | # After the next page opens, click the '''Activate''' button. <br> <br>[[File:Help desk 2fa setup activate.png|401x401px]]<br> | ||
# The token will activate. | # The token will activate. This can take a few minutes. You don't have to do anything while it activates, just wait for the next screen to load. <br> <br>[[File:Help desk 2fa setup activating.png|690x690px]]<br> | ||
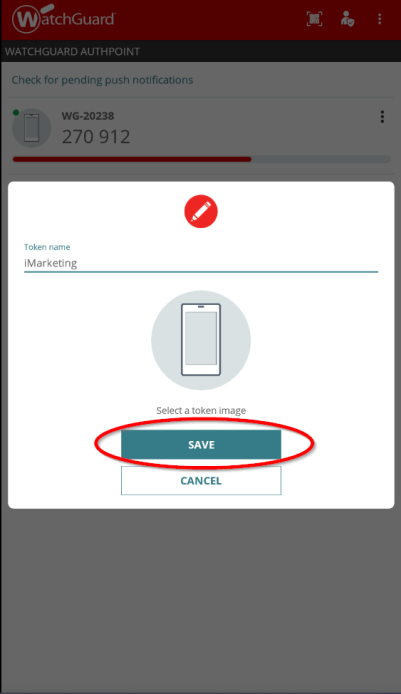
# Once it's activated, you can set a token name (not required). | # Once it's activated, you can set a token name (not required). I named this one ''iMarketing''. Click the '''Save''' button. <br> <br>[[File:Help desk 2fa setup name.png|694x694px]]<br> | ||
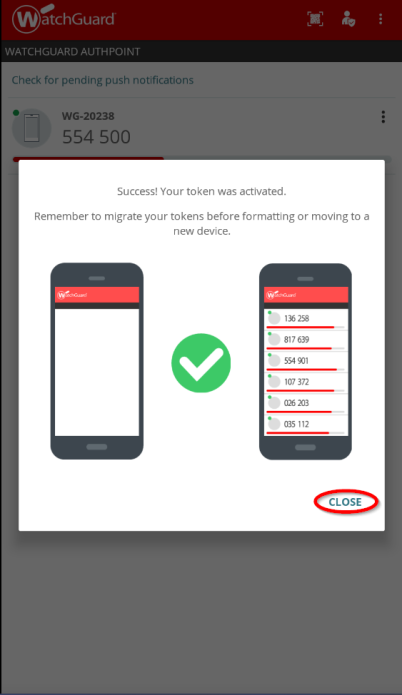
# This screen verifies the token is setup and ready. | # This screen verifies the token is setup and ready. Press the '''Close''' button. <br> <br>[[File:Help desk 2fa setup verified.png|695x695px]]<br> <br> <br> <br>''If any information is incorrect or out-of-date, please notify the Technical Support team at [mailto:workfromhome@imkgp.com workfromhome@imkgp.com].'' | ||
Latest revision as of 20:42, 5 July 2024
- Download the the free WatchGuard AuthPoint application.
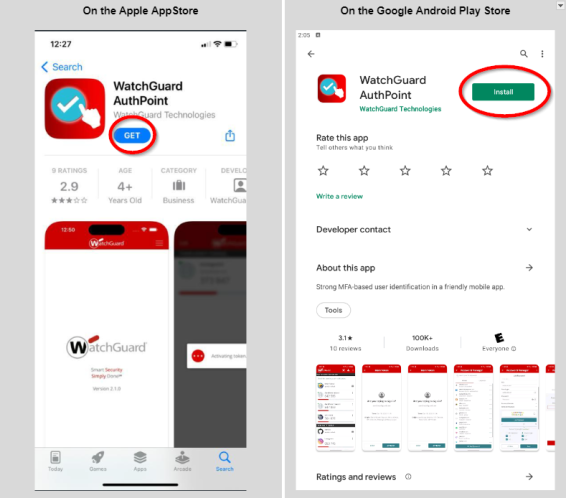
- Go to the Google Play Store or the Apple App Store and search for Watchguard AuthPoint.
- If you have an Apple phone, click the blue GET button and wait for the app to install.
- If you have an Android phone, click the green Install button and wait for the app to install.
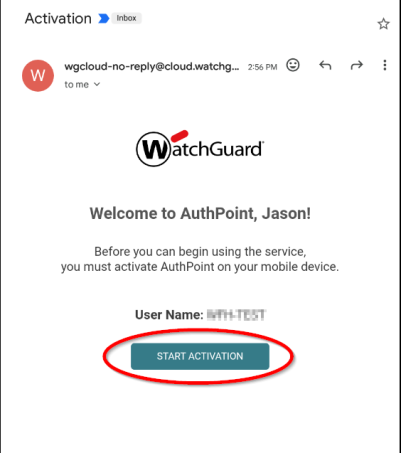
- Find the email from WatchGuard, open it and click on the Start Activation button.
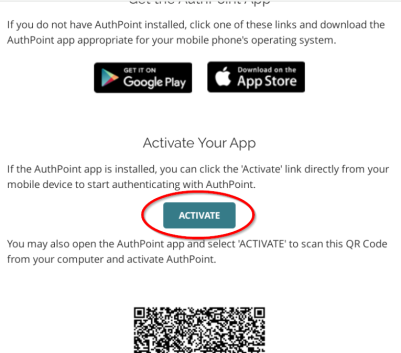
- After the next page opens, click the Activate button.
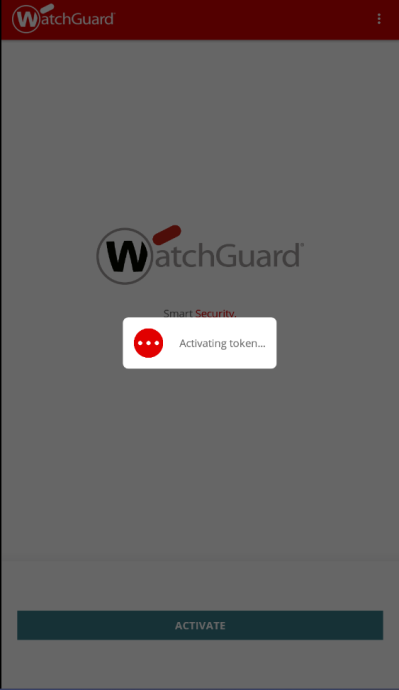
- The token will activate. This can take a few minutes. You don't have to do anything while it activates, just wait for the next screen to load.
- Once it's activated, you can set a token name (not required). I named this one iMarketing. Click the Save button.
- This screen verifies the token is setup and ready. Press the Close button.
If any information is incorrect or out-of-date, please notify the Technical Support team at workfromhome@imkgp.com.


